guides
Self-Watering Containers DIY: The $12 Build That Ends Daily Watering
Two buckets, a cup, and a tube = a container that waters itself for days. The honest build guide, which crops love wicking beds, and the overflow hole everyone forgets.
Honest disclosure: Some links below are affiliate links — Glivox earns a commission if you purchase, at no extra cost to you. We pay full price for products we review and rankings are never paid. Read the full policy.
Container gardening has exactly one serious tax: summer watering. A pot on a hot patio can need water every single day — miss two and the tomato sulks, miss a long weekend and it’s compost. It’s the reason half of all balcony gardens quietly die in August, and it’s the honest downside we flag every time we recommend pots.
The fix costs about twelve dollars and was never a secret: the self-watering container — a pot with a water reservoir underneath, so the soil drinks by wicking, on its own schedule, for days at a time. Commercial versions charge $40–120 for the idea. Two nested buckets build the same physics in twenty minutes. Here’s the honest build, what actually grows better in one, and the single hole that decides whether yours works or drowns.
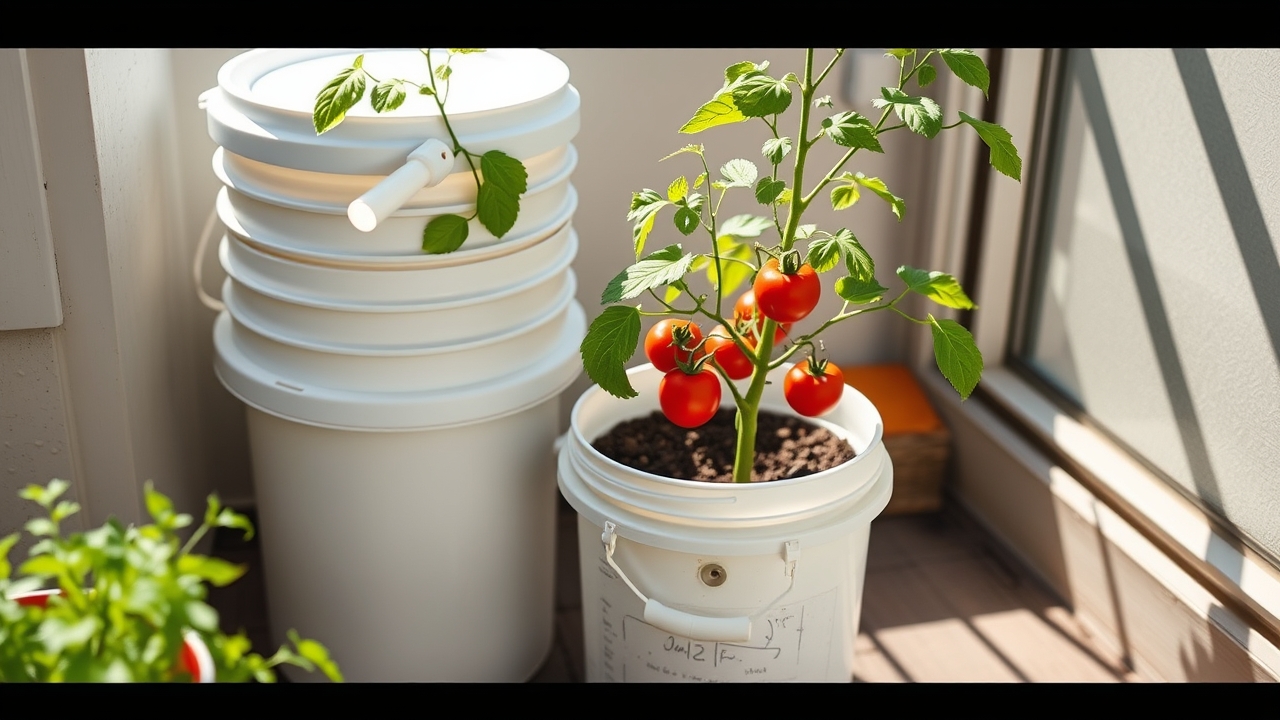
TL;DR — how a wicking container works
A reservoir of water sits below the soil, separated by a barrier. A column of soil (in a perforated cup or basket) dips through that barrier into the water and wicks moisture upward — the same capillary action as a paper towel touching a spill. Roots drink from steadily-moist soil; you refill through a tube every 3–7 days instead of watering daily; and a small overflow hole drilled at reservoir height makes overwatering physically impossible — extra just runs out. That’s the entire machine: no pump, no electronics, no product to buy. Thirsty, steady-drinking crops (tomatoes, greens, cucumbers) thrive; drought-loving Mediterranean herbs actively hate it — match the plant to the physics.
Buy it if
your pots need daily summer watering, you travel on weekends, or your balcony tomato keeps getting blossom-end rot from moisture swings
Skip it if
rosemary, thyme, lavender and succulents — constant-moist feet is exactly how you kill them; give those a normal dry pot
Try instead
Not into DIY? A deep saucer kept topped up under a fabric pot is a crude 60% version — works for a long weekend
The classic 2-bucket build ($10–15, 20 minutes)
Parts: two nested 5-gallon buckets (food-grade — same sourcing as the bucket garden), one plastic cup or small container, a length of ~3 cm pipe or tube (old hose, PVC offcut), and a drill.
- The wicking cup. Drill the cup full of holes (sides and bottom). Cut a hole in the center of the inner bucket’s floor sized so the cup sits in it snugly, hanging down into the gap below.
- Aeration holes. Drill a dozen small (~6 mm) holes across the rest of the inner bucket’s floor — roots need air exchange over the reservoir.
- The fill tube. Cut a hole near the edge of the inner bucket’s floor for the tube; it must reach from above the soil surface down into the reservoir. Cut its bottom at 45° so it can’t seal against the outer bucket’s floor.
- THE OVERFLOW HOLE — the step that makes or breaks it. Drill one ~8 mm hole in the outer bucket’s side, just below the level of the inner bucket’s floor. This sets the maximum water level. Skip it and rain or an over-enthusiastic fill floods the soil column — the drowned-roots failure people blame on “the method.”
- Assemble and fill. Nest the buckets. Pack the wicking cup firmly with moistened potting mix (a loose cup doesn’t wick — firm contact is the pump). Fill the rest with quality potting mix — never garden soil, which wicks poorly and compacts (the container-soil rules apply doubly here). Plant, water once from the top to prime the column, then fill the reservoir via the tube.
Same physics scales up: an 18-gallon storage tote with a pond-basket wick makes a patio bed for two tomato plants; a row of them is a rental-friendly kitchen garden.
3-7 days
Typical refill interval for a 5-gallon wicking bucket — versus daily watering for the same pot in July
What thrives in one (and what genuinely doesn’t)
Loves wicking beds: tomatoes above all — the steady moisture largely eliminates the wet-dry swings behind blossom-end rot and fruit cracking — plus peppers, cucumbers, eggplant, lettuce and greens (shallow roots, constant thirst), chard, basil and mint among herbs, and strawberries.
Hates wicking beds: the dry-country crew — rosemary, thyme, oregano, sage, lavender — evolved for drought cycles and rot in permanent moisture. Root crops are mixed (carrots fork in wet lower layers; radishes are fine). And anything overwintering outdoors should come out of standing water before frost.
One honest agronomy note: reservoirs don’t rinse soil the way top-watering does, so fertilizer salts accumulate. Once a month, water heavily from the top until it runs from the overflow — a “flush” that resets the salt level. Container feeding rules otherwise unchanged: little and often.
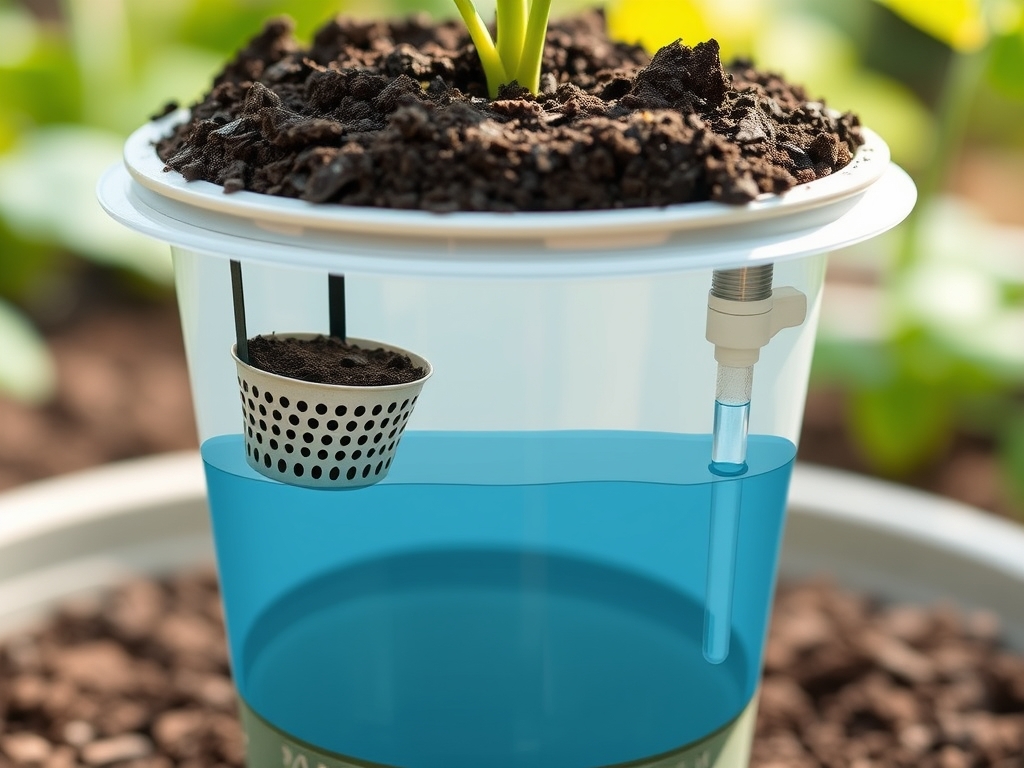
Why this beats daily watering (it’s not just labor)
Daily hand-watering is actually a hard skill — the pot dries unevenly, weekend gaps stress the plant, and every stress window costs fruit. A reservoir converts watering from a daily performance into a weekly logistics task, and the plant gets the bigger win: steady moisture means steady nutrient uptake, no wilt-recover cycles, and measurably better fruit set on tomatoes and peppers. This is the same deep-and-rare principle the in-ground garden runs on — the reservoir just automates it. For vacation resilience, a full 5-gallon reservoir in mild weather buys close to a week; two totes buy a real holiday.
The honest limits: build quality matters (a loose wick cup = dry plant over a full reservoir — the most common failure), mosquitoes will find an unsealed fill tube (cap it or stuff a scrap of screen in the top), and in cool wet spring weather the reservoir can keep soil too wet for seedlings — let the reservoir run dry between refills until real heat arrives.
Quick wins vs. build-killers
What works
- Drill the overflow hole FIRST — it makes overwatering impossible
- Pack the wick cup firmly with moist mix (firm contact IS the pump)
- Cap or screen the fill tube (mosquitoes find open water in days)
- Top-flush monthly to rinse fertilizer salts out the overflow
What doesn't
- Skipping the overflow hole (first rainstorm = drowned roots)
- Garden soil instead of potting mix (wicks badly, compacts, quits)
- Planting rosemary or thyme in one (constant moisture = root rot)
- A loose, half-filled wick cup (reservoir full, plant bone dry)
FAQ
How does a self-watering container actually work?
A water reservoir sits beneath the soil, separated by a platform. A column of firmly-packed potting mix extends down through the platform into the water and wicks moisture upward by capillary action — the same way a paper towel draws up a spill. The soil stays evenly moist, roots drink at their own pace, and you refill the reservoir through a tube every few days. An overflow hole drilled at the platform level caps the water height, so the soil column itself never floods. No pump or power involved — just physics.
What vegetables grow best in self-watering containers?
Steady drinkers with high summer thirst: tomatoes are the star (constant moisture prevents the wet-dry cycling behind blossom-end rot and cracking), followed by peppers, cucumbers, eggplant, lettuce and leafy greens, chard, basil and mint. Skip the Mediterranean herbs — rosemary, thyme, oregano, sage and lavender want to dry out hard between waterings and will rot with permanently moist feet. Carrots and other deep root crops are also poor fits; the lower soil stays too wet for clean roots.
How often do you refill a self-watering container?
A 5-gallon wicking bucket with a mature tomato in hot weather: every 3–4 days; in mild weather or with smaller plants: weekly or longer. The fill tube doubles as a gauge — look (or dip a stick) to see the level. The practical habit is a fixed schedule (say, Monday and Friday) with a top-up before any trip. In cool or rainy stretches, let the reservoir run dry for a few days between refills so the soil breathes; constant maximum moisture is only a virtue in real heat.
Why did my self-watering bucket stay dry even with water in the reservoir?
Almost always the wick: the cup bridging soil to water is packed too loosely, filled with the wrong material (bark-heavy or dry mix), or has lost contact with the soil column above. Capillary action needs a continuous, firm path of fine-textured moist medium from water to roots — repack the cup tightly with pre-moistened potting mix and water once from the top to re-prime the column. The other culprits: a fill tube whose bottom seals flat against the bucket floor, or a reservoir that’s emptier than the tube makes it look.
Glivox publishes practical, honest guides for homesteaders and backyard growers — the best watering schedule is the one physics keeps for you.
Keep reading
guides
Container Vegetable Gardening: How to Grow Food in Pots (2026 Guide)
No yard? No problem. A practical guide to growing vegetables in containers — which pots, what soil, the best crops for pots, and how to keep container plants watered and thriving through summer.
guides
How to Water a Vegetable Garden in Summer (Without Killing It)
Summer watering makes or breaks a vegetable garden. How much, how often, what time of day, and the watering mistakes that quietly kill plants in the heat — a practical 2026 guide.
guides
The 5-Gallon Bucket Garden: Grow Real Food for Almost Nothing
Free buckets, a few drainage holes, and the right crops — how to build a productive vegetable garden from 5-gallon buckets, including the self-watering DIY upgrade.